
How to Fix Leaking Gutter Joints
by
A gutter joint that drips every time it rains is rarely just a small annoyance. If you want to know how to fix leaking gutter joints properly, the first job is finding out why that joint has failed in the first place. In our line of work, a leak at the joint often points to one of three problems – dirt trapped in the connection, a failed seal, or movement in the gutter run that keeps pulling the joint apart.
That matters because the right repair depends on the cause. Smearing sealant over the outside may slow a drip for a while, but it usually does not solve the problem for long. A proper fix means cleaning, checking alignment, replacing seals where needed, and making sure the gutter is still supported correctly.
Why gutter joints start leaking
Most leaking joints do not fail out of nowhere. The joint is already under strain from water flow, seasonal expansion, and the weight of debris sitting in the gutter. Once a small gap appears, water starts tracking through it and the problem gets worse.
On modern plastic systems, the rubber seal inside the union can flatten, crack, or slip out of position. On older metal guttering, corrosion around the joint can eat away the connection itself. We also see leaks caused by blocked outlets or downpipes. When water backs up, it sits higher in the gutter than it should and begins escaping through weak points that might not leak under normal flow.
The other common issue is movement. If a bracket has loosened, the gutter can sag near the joint. If the fall is wrong, water pools against the connection instead of running away from it. In those cases, repairing the joint without correcting the support is only half a job.
How to inspect leaking gutter joints before you repair them
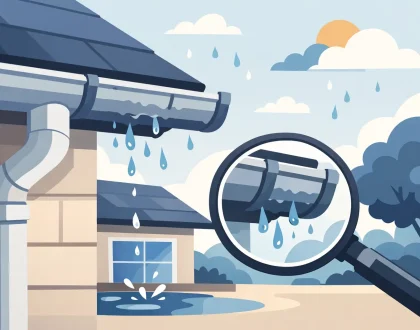
Before doing any repair, look at the full section of gutter, not just the wet spot. Start from ground level if you can. Check whether the gutter is overflowing, sagging, bowed, or visibly separated at the connection. Look for staining on brickwork, green algae, or marks on fascia boards. Those signs often show that the leak has been there longer than expected.
If you can inspect safely from a ladder, clear out leaves, moss, and sludge around the joint first. Many leaks turn out to be caused by buildup pushing water over the lip or preventing the joint from seating properly. Once the debris is gone, you can see whether the union is cracked, whether the seal is missing, or whether the two lengths of gutter have pulled apart.
This is also the point where honesty matters. If the gutter is high, access is awkward, or the brackets are unstable, it is safer to leave it to a properly insured gutter repair company. No small leak is worth a fall.
How to fix leaking gutter joints step by step
If the gutter is in otherwise decent condition, the repair is usually straightforward. The exact method depends on the material and the style of joint, but the principle stays the same – take the stress off the joint, clean it properly, and refit it with the correct seal.
Clean the area properly
Start by removing all debris from the gutter run. Flush it through with water if needed and make sure the outlet is flowing freely. Dirt left behind around the joint will stop seals from sitting correctly and prevent any repair product from bonding.
Once clear, dry the area as much as possible. A lot of failed DIY repairs come down to trying to apply sealant onto a wet, dirty surface. It might stick for a short time, but not through a season of rain and frost.
Take the joint apart if possible
On many plastic systems, the union fitting can be unclipped or unscrewed so the two lengths of gutter can be separated. That is usually better than trying to patch from the outside. Check the rubber gasket inside. If it is twisted, brittle, flattened, or missing sections, replace it. If the union itself is cracked, replace the whole fitting.
If the gutter has slipped out of the marked insertion depth, refit it to the correct position. Thermal movement is normal in plastic guttering, so the joint needs to allow for expansion. Forcing it too far one way can create another leak later.
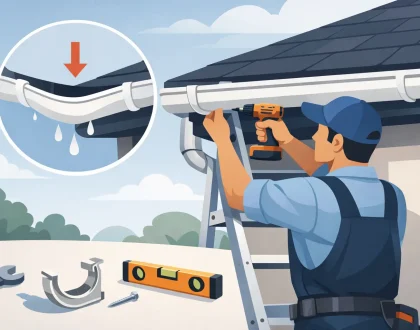
Check line, fall, and support
Before putting the joint back together, check the brackets on both sides. If one is loose, broken, or too far from the joint, the connection will stay under strain. The gutter should have a steady fall toward the outlet without obvious dips. A leaking joint beside a sagging length of gutter often needs an extra bracket or a reset of the run.
This is where experience makes a difference. The leak you can see is not always the actual fault. Sometimes the joint is only reacting to movement caused elsewhere.
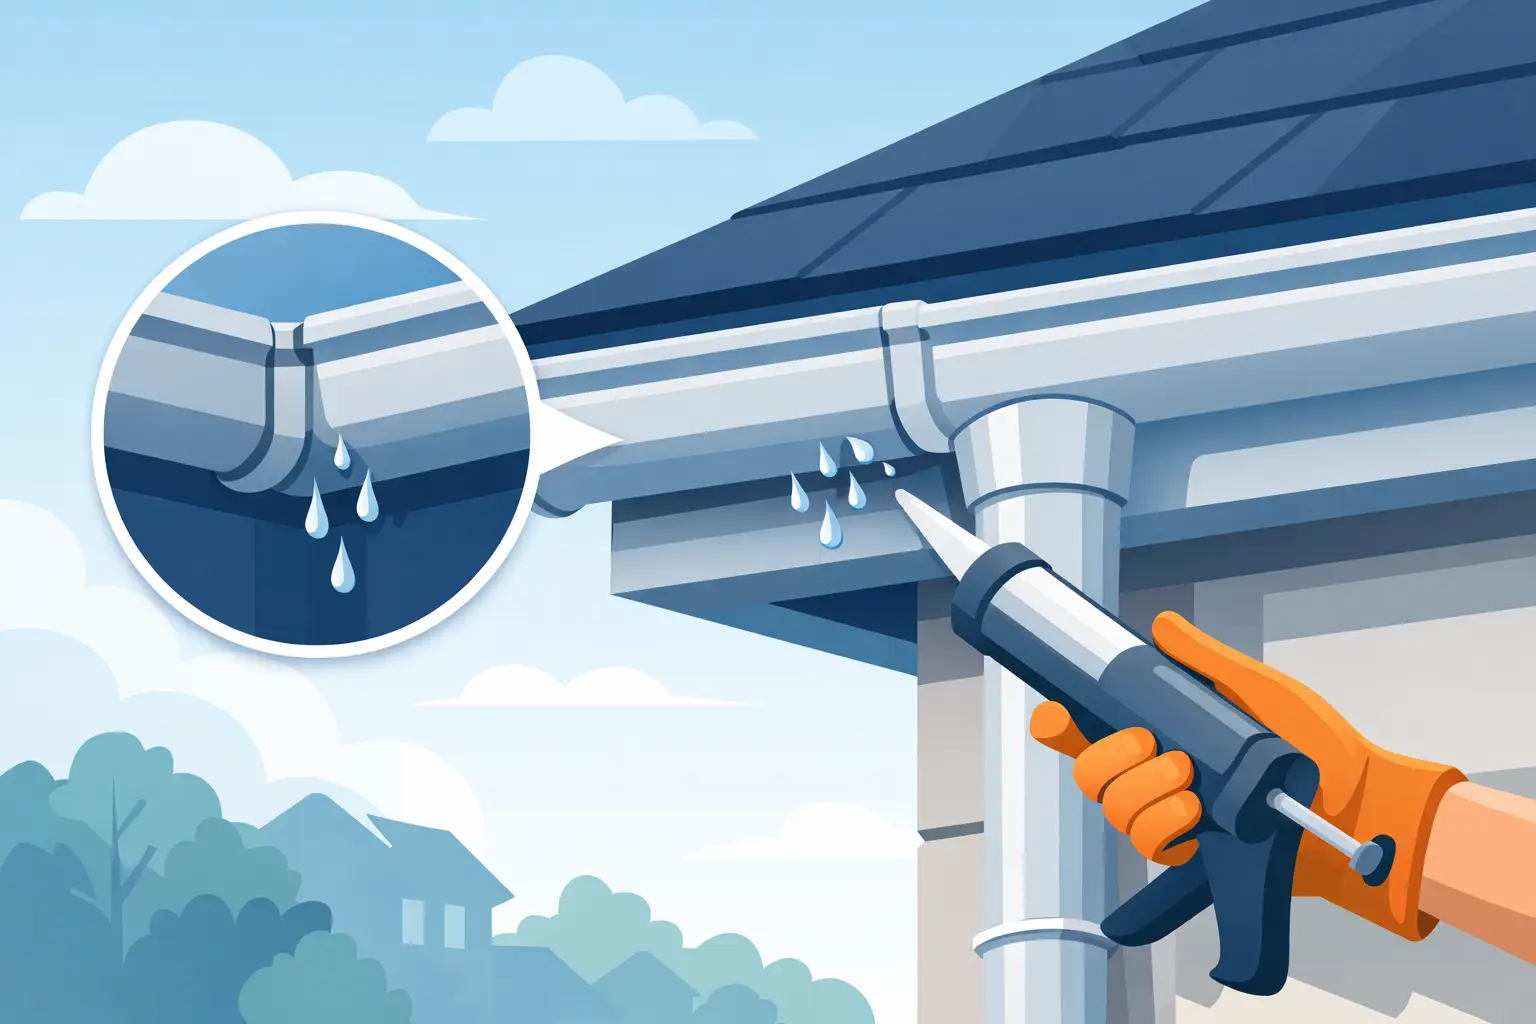
Use sealant carefully, not as a shortcut
If the system is designed to use rubber seals, replacing the seal is usually more reliable than relying on sealant alone. A compatible gutter sealant can help on some repairs, especially where the manufacturer allows it, but it should support the joint, not hide a bad fit.
For metal gutters, repairs may involve sealing small gaps after rust treatment and cleaning, but if corrosion has spread through the joint, replacement is often the smarter option. Patching rotten metal tends to become repeat work.
Test with water
Once the joint is reassembled, run water through the gutter with a hose and watch the connection closely. Test the full run, not just the repaired point. A proper test will also show whether water is backing up from a blocked downpipe or whether another joint further along is starting to fail.
When a leaking joint needs more than a simple repair
There is a point where repairing one joint stops being good value. If several joints are leaking, brackets are pulling away, and the guttering has gone brittle or warped, a piecemeal fix can cost more over time than replacing the affected run.
The same applies if the fascia board behind the gutter has suffered water damage. In that case, the joint leak is only part of the issue. You may need gutter repair, fascia work, and a check of the roofline as a whole. That is why a proper service is more than just clearing out leaves. A full inspection catches the issues that cause repeat leaks.
For commercial buildings and larger homes, another factor is scale. Long gutter runs, box gutters, and awkward access points can hide multiple defects. One visible leak may be the result of poor flow, standing water, or failure at several joints at once.
Common mistakes homeowners make
The biggest mistake is treating every leak with a quick bead of caulk from the outside. It feels like a fast solution, but it often traps dirt, fails in bad weather, and makes proper repairs harder later.
Another common problem is ignoring the downpipe. If water cannot drain away, the gutter joint remains under pressure. We also see people replace a union but leave a sagging bracket right next to it. The new part then fails for the same reason as the old one.
Then there is timing. A small leak in fall becomes a bigger job after winter, especially in freezing conditions. Water gets into tiny gaps, expands, and opens the joint further. What could have been a simple seal replacement can turn into a cracked fitting or damaged fascia.
How to stop gutter joints leaking again
Prevention is usually simpler than repair. Keep gutters cleared so water runs freely and joints are not sitting full of sludge. Make sure downpipes are open. After heavy rain, take a quick look from the ground for drips, staining, or overflow.
It also pays to have the full gutter line checked every so often, particularly on extensions, conservatories, and older rooflines where movement is more common. Family-run companies like Steve’s Gutters tend to approach this the practical way – inspect, clean, repair, and only recommend replacement when the repair is no longer the sensible option.
If you are weighing up whether to repair or replace, the best question is not just can this joint be sealed. It is whether the gutter system around it is still doing its job. Fix the cause, not just the drip, and you will usually save yourself money, mess, and another callout the next time it rains.
Recommended Posts
How to Fix Sagging Guttering Properly
June 14, 2026

Commercial Gutter Maintenance Checklist
June 12, 2026
How to Spot Leaking Gutters Early
June 10, 2026